
Setting Up Your WordPress Hosting, As technology quickly develops, staying ahead of the game when managing an online platform is critical, by mastering WordPress hosting setup, you can unlock its powerful content management system to deliver an exceptional user experience to visitors.

If you’re a small-scale business that is just beginning its journey or an established company seeking to grow your online presence, an effective website is crucial. There are many options to create a website; however, WordPress is among the most well-known options due to its flexibility and customizable capabilities. In this tutorial, we’ll walk you through how to construct your own WordPress website in nine steps.
Table of Contents
How To Build A WordPress Website
Our expert tips and tricks provide all the knowledge and tools needed to navigate through a sea of hosting options while accommodating growth and scaling seamlessly with ease, So prepare yourself as we embark on this thrilling journey – you are about to elevate your digital presence like never before.
1. Get Web Hosting and a Domain Name
The first step to building your WordPress website is to acquire web hosting. Although WordPress is a free web-based website builder, you will need an online hosting service to allow your website to be accessible on the Internet. It typically costs less than 10 dollars per month. When you first get web hosting, you can save time and money since the most effective WordPress hosting solutions come with the domain name for free and a one-click WordPress installation that makes the process of making your WordPress site much easier.
Choose a Domain Name
If you choose an internet hosting plan that comes with a free domain (e.g., businessname.com) like bluehost, you’ll be required to select an appropriate domain during the account registration process. If not, you can purchase domain names directly with any of the most reliable domain name registration companies like GoDaddy or Google Domains and then manually connect your domain name to the web hosting service.
When you are choosing a domain, take the following into your head:
- The shorter, the more efficient.
- Beware of dashes and numbers.
- It is best to stick to .com. However, other alternatives are worth considering.
- Avoid using trademarked names or copyrighted content.
- Verify that the domain is in use.
- Do not use words that are difficult to pronounce or spell.
For more information, you can visit the first part : How to Choose the Best Domain Name and Hosting for Your Website.
Install WordPress
When you’ve completed the purchase of a web hosting service such as our top choice, bluehost, it’s time to install WordPress (in other terms, connect your website hosting account to WordPress).
To accomplish this, log into your dashboard (or cPanel), navigate through “Websites” on the vertical menu on the left, and then select “Manage Websites.” Once there, select the site you wish to create and select “Manage,” after which click “Install WordPress.”
Be aware that this process could take a short time, and the steps can differ a little by web hosting company.

2. Find and Install a WordPress Theme
Within the realm of WordPress themes, they are an online template. It determines how your website appears, as well as the way it operates and what it’s from the box capable of. There are many themes to choose from, and there are sites like ThemeForest that let you search for and purchase premium themes, so it’s worth the effort to select one that is best compatible with the website you’re planning to create. When you have found the perfect theme for your needs, buy it, then download the theme’s files.
In addition, you can download gratis themes on WordPress. However, they typically need a lot of work, and in the end, it’s generally advisable to purchase a premium theme.
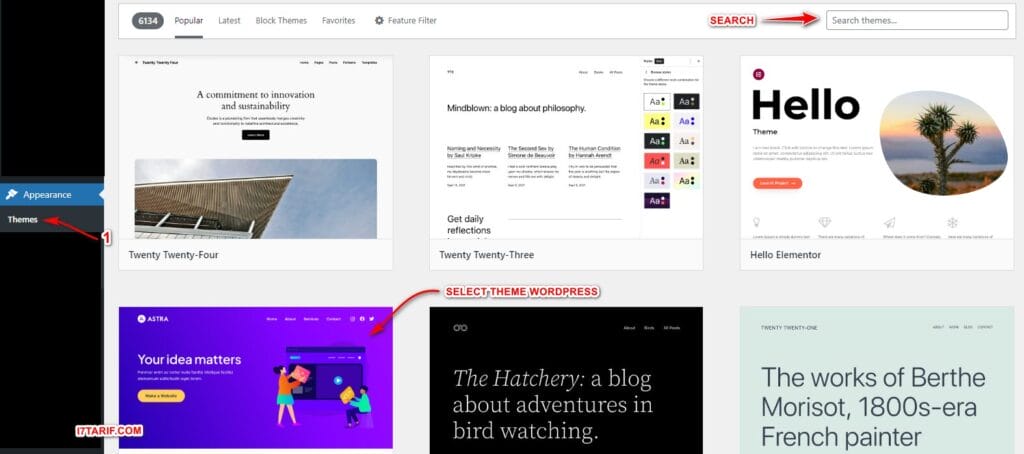
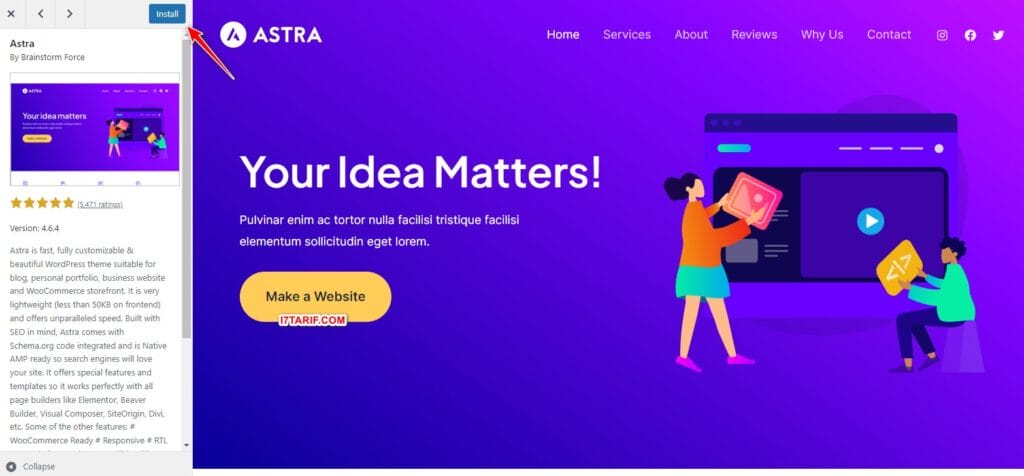
How to set up the best WordPress theme:
- Navigate to your WordPress dashboard by signing in to your account (yourdomain.com/wp-admin).
- On the left side, From the left panel, choose “appearance,” after which select “themes” in the drop-down menu.
- Simply click “Add New” on the upper right-hand side of the page. Click “Add new” at the top of the page.
- Choose “Upload Theme.”
- Select “browse” and then locate the zip file that contains themes you downloaded after purchasing.
- Choose “Install” followed by clicking “activate.”
3. Install Plugins
After you have installed your theme, then you must install and activate all necessary plugins. These are the ones that can help you improve WordPress’s performance. Alongside the plugins that are included with the theme, there are many more to pick from that will do anything from improving the security of your site to adding live chat and changing your page editor to an editor that you can drag and drop. But you should restrict the number of plugins you install since too many may cause your site to be slower or make other plugins break.
For instance, we suggest these plugins for every commercial website:
- Yoast SEO The plugin will help you improve the content of your blog posts to search engines.
- Google Analytics: Monitor your website’s visitors and activity. If you’re an online blogger, this is essential as the majority of brands won’t be able to work with the blogger if they don’t have Google Analytics installed.
- Jetpack: The plugin offers security, upkeep, and performance enhancements to your website.
- Akismet, Guard your website from comments that are spam on your blog post.
- Elementor: Use a page builder plugin such as Elementor to turn an editor for your pages into a user-friendly drag-and-drop editor for beginners.
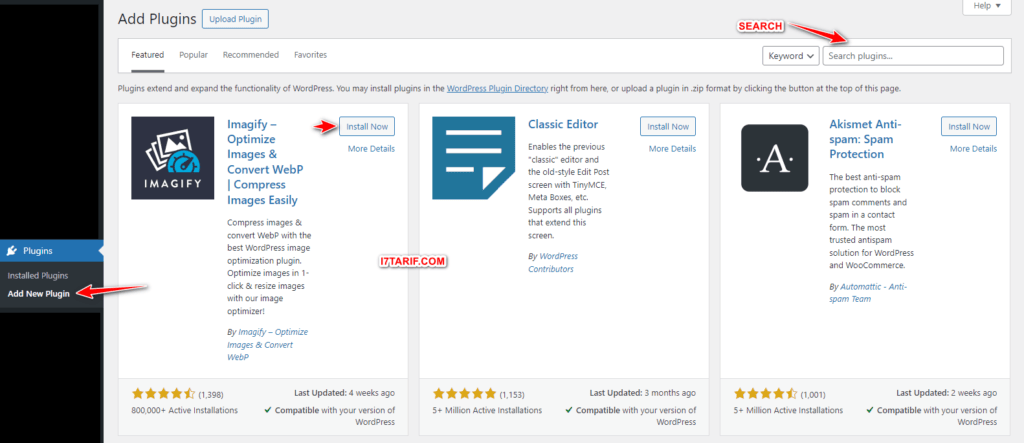
How to Install WordPress plugins:
- On Your WordPress dashboard, click “plugins” in the menu on the left.
- Simply click “add new” from the drop-down menu.
- Input the name of the plugin you’d like to install.
- Click “install right now” followed by “activate.”
4. Import Demo Content (Optional)
If you’ve chosen a premium template, you’ll have to import the template’s demo content. Without demo content, your website will be more difficult to create because it’ll be using the themes’ plugins, styling, and features. However, it won’t include one of those prebuilt websites.
The procedure for loading demo content is different for each theme, Most of the time, when you install your theme, you’ll be able to see a menu in the vertical menu on the left-hand side with an initial theme. This is where demo content will typically be located. If you don’t see the content there, consult the manual for your theme to learn what to do in order for you to upload demo material that is usually located in the theme’s files (from the company you purchased the theme from).
5. Configure WordPress Settings
Before you can begin to customize web pages and create website content, you’ll have to set your preferences, for example, showing your home page as well as the blog posts page and changing your website’s name along with the tagline and website icon.
Here’s how to set up the most popular settings:
- Logos: Go to “Appearance” > “customize” > “site identity” > “change logo” and upload your logo
- Website title Click “appearance” and then “customize” then “site identity” > input your site’s title (a.k.a. the name of your company)
- Tagline for site: Go to “Appearance” > “customize” > “site identity” > input the site tagline (or just delete your tagline that defaults to WordPress tagline)
- Website icon Visit “appearance” Click “customize” then “site identity” >” site icon “site icon” click “change image” and upload the image you want to use as your site’s icon (a.k.a. favicon).
- Homepage: Go to “Appearance” > “Customize” > “Homepage settings” and choose the website you wish to make your home page.
- Blogs: Go to “Appearance” > “Customize” > “Homepage settings,” and then under “posts page,” choose the page you wish to use as your blog.
- Permalink configurations: Go to “settings” > “permalinks,” then select the structure you prefer (typically “post title”), and then save the changes.
6. Create Pages
It’s now time to create your websites, which are comprised of websites. For instance, a typical commercial website has a lot of pages, including the homepage and services, pricing or about, as well as contact. In WordPress, every page that isn’t a blog article (or article) is regarded as a page.
Learn how to create and/or modify pages using WordPress:
- On your WordPress dashboard, navigate to “pages” on the menu left-hand vertical.
- To create a brand new page, Click “add new.”
- To alter the existing page, click “all webpages,” locate the page within the pages list, and then click “edit.”
- If you have installed an application for building pages, then select the option on the top to edit using the constructor (e.g., “edit with Elementor”).
- Write your site’s copy and then customize your pages.
- Once you’re done when you’re done, click publish.
- Repeat the steps for any additional pages you wish to make.

7. Set Up Your Menu
After you’ve created your pages, make and set up your menu. It is how users navigate across your website; consequently, depending on the theme, there may be multiple menus (such as one on the uppermost part of your site as well as one at the bottom).
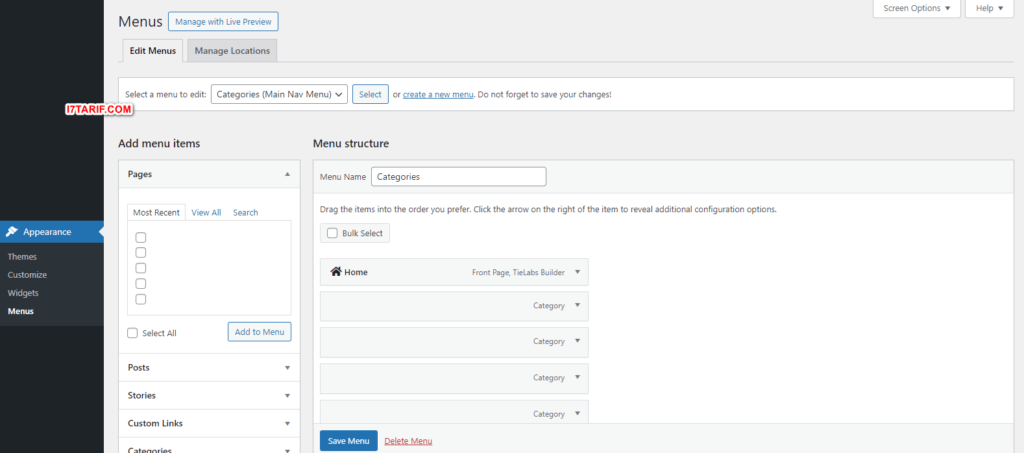
Here’s how to set up the menu for your site:
- On your dashboard, select “appearance” >> “menus.”
- In order to add more pages, choose the desired page from the left-hand list.
- Click and hold the pages to change the order of your menu or to group pages into sub-pages that are below other pages.
- Save modifications.
After you’ve set up your menu, go down the page and locate the section titled “menu setting.” In the section called “display place,” make sure you check the box beside “primary.” That will make the menu the main menu on your website that will be displayed on your homepage.
8. Write Your First Blog Post (Optional)
Apart from websites, many companies are also opting to include blog posts in order to boost their chances of being discovered on search engines, for instance, Google. To write a blog article, visit “posts” in the left-hand vertical menu and select “add the new.” There, you can edit your blog post in the same way as you would with a page. A key difference is that, unlike pages, you can write a blog article and plan it for publication at a later time.
How to make blog posts in WordPress:
- Choose “posts” on the left-hand side of your dashboard. Click “Add to the list.”
- Enter the name of the post.
- Select the category that you would like to place it in.
- Write the content you want to share.
- After you’re done, Click Publish.
If you’re not getting your blog posts to show up on your website, it’s possible to verify that you’ve linked your blog’s page to WordPress. To accomplish this, head on to “appearance” and then “customize” >> “homepage setting.” Then go to “posts pages” and choose the page you wish to use as your blog’s homepage.
9. Market Your Site
Last but certainly not least, you must consider marketing your site. This is because websites aren’t necessarily a “build the site, and it will come”-type or thing. The businesses that are noticed online are those that invest in a range of marketing strategies to ensure their website gets exposure online. This can help bring more customers to your site.
Here are some of the top strategies to advertise your site:
- Upload your web address to Google Search Console to help you rank faster.
- Make social media pages on your site and include hyperlinks in your posts (e.g., the Facebook Business Page, An Instagram account, or an account on Pinterest for business). Pinterest company account).
- Submit your site to the appropriate online directories (i.e., Yellow Pages, Tripadvisor, Yelp).
- Create an account on Google My Business account to be found in local searches.
- Join the Better Business Bureau.
- Include your website’s URL in your signature on emails or business cards. You can also add it to any other marketing material you might want to make use of.
The most effective method to promote your site is to make use of various strategies to give your website the most exposure and best chance of being found on the internet.
WordPress Benefits
WordPress is by far the most well-known blog platform and more than 43% of internet users make use of it. It’s a popular choice for reasons. It’s used to create blogs, websites, complex portals, corporate websites, and applications that offer huge potential for customization and flexibility. WordPress.org software is free and open-source. WordPress.org software is free and open-source and is ideal for a coder. WordPress is also supported by a huge user and developer community that is always developing new widgets, plugins, themes, and other features that enhance the user experience.
FAQ How To Build A WordPress Website
What is WordPress hosting?
WordPress hosting is a specialized hosting service optimized for running WordPress websites. It offers features and performance tailored to the specific needs of WordPress.
Do I need technical knowledge to set up WordPress hosting?
Basic technical knowledge can be helpful, but many hosting providers offer user-friendly interfaces and one-click installations to make the process easier.
What are the benefits of using WordPress hosting over regular web hosting?
WordPress hosting provides optimized server configurations, automatic updates, enhanced security measures, and expert support specifically designed for WordPress sites.
Can I migrate an existing website to WordPress hosting?
Yes, most hosting providers offer migration services or tools to help you seamlessly transfer your existing website to their WordPress hosting platform.
Shared WordPress hosting means your site shares resources with other websites on the same server, while managed WordPress hosting includes additional support and optimization services.
Are there any recommended plugins for optimizing a website on WordPress hosting?
Yes, popular plugins for optimizing performance include WP Super Cache, W3 Total Cache, and Yoast SEO.
How can I ensure my WordPress site is secure on my chosen hosting platform?
Utilize strong passwords, keep software updated, use security plugins like Wordfence or Sucuri, and consider investing in an SSL certificate for encrypted connections.
Can I upgrade my WordPress hosting plan as my website grows?
Most providers offer scalable plans that allow you to upgrade your resources easily as your website traffic and content expand.
Conclusions
In conclusion, setting up your WordPress hosting is a crucial step in establishing an online presence for your business or personal website. By carefully considering factors such as performance, security, and support, you can ensure a reliable and efficient hosting environment for your WordPress site.
Additionally, choosing the right hosting provider and plan can make a significant impact on your website’s success and user experience. With the proper setup and configuration, you can maximize the potential of your WordPress site and create a seamless browsing experience for your visitors. Take the time to research and compare different hosting options to find the best fit for your needs, and start enjoying the benefits of a well-managed WordPress hosting solution today!
